 w3newbie.com
How To Use The Duplicator WordPress Plugin With MAMP

So you’ve created an awesome looking WordPress website on the server with your hosting account and your wondering how the heck you can backup and restore your website on a different domain name or on your computer itself. The problem with backing up WordPress websites or moving them to a different location is that they use MySQL databases (interacting with the PHP code that WordPress runs on) so simply dragging and dropping files in an FTP program such as FileZilla won’t cut it. Backing up the database separately, on top of FTP, can be a daunting task so why not cut to the chase and show how it’s done with ease. MAMP is the number one WordPress Plugin for “cloning” and backing up then subsequently restoring a WordPress website. MAMP is for Mac user, WAMP is for Windows users. Check out the video Below or scroll down a bit to get the play by play on how to clone your website.
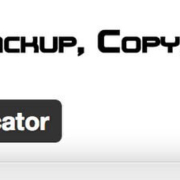
Step 1. Search for, download and install the “Duplicator” plugin in the backend of your WordPress website that you want to backup, clone or transfer.
2. Go into the Duplicator plugin and select “Package” then on the packages page select the ‘create new package’ icon in the center of the screen.
3. After selecting the new package icon, select “Create Package Set” in the pop-up window.
4. Once the package set has been create, click on the “Installer” and “Package Icons” to the right of the screen. This will download the two zip files we’ll need so make sure your computer doesn’t automatically unzip the files upon downloading them.
5. Now we can close our web browser with the WordPress website in need of backing up and open MAMP (also WAMP or your hosts server if it applies). Make sure the MySQL server is running, open up the “htdocs” folder in MAMP and create a fold with your website name then drop the two zip files into the folder.
6. Next we’ll go into our MAMP start page, PHPMyAdmin, then Databases and create a database (I’ll name it “database”). Go to “localhost:8888/database/installer.php and fill in the following information.
7. After selecting “Run Deployment”, on the following page select “Run Update”. At last, we can go to our local website at “localhost:8888/site”!
 w3newbie.com